
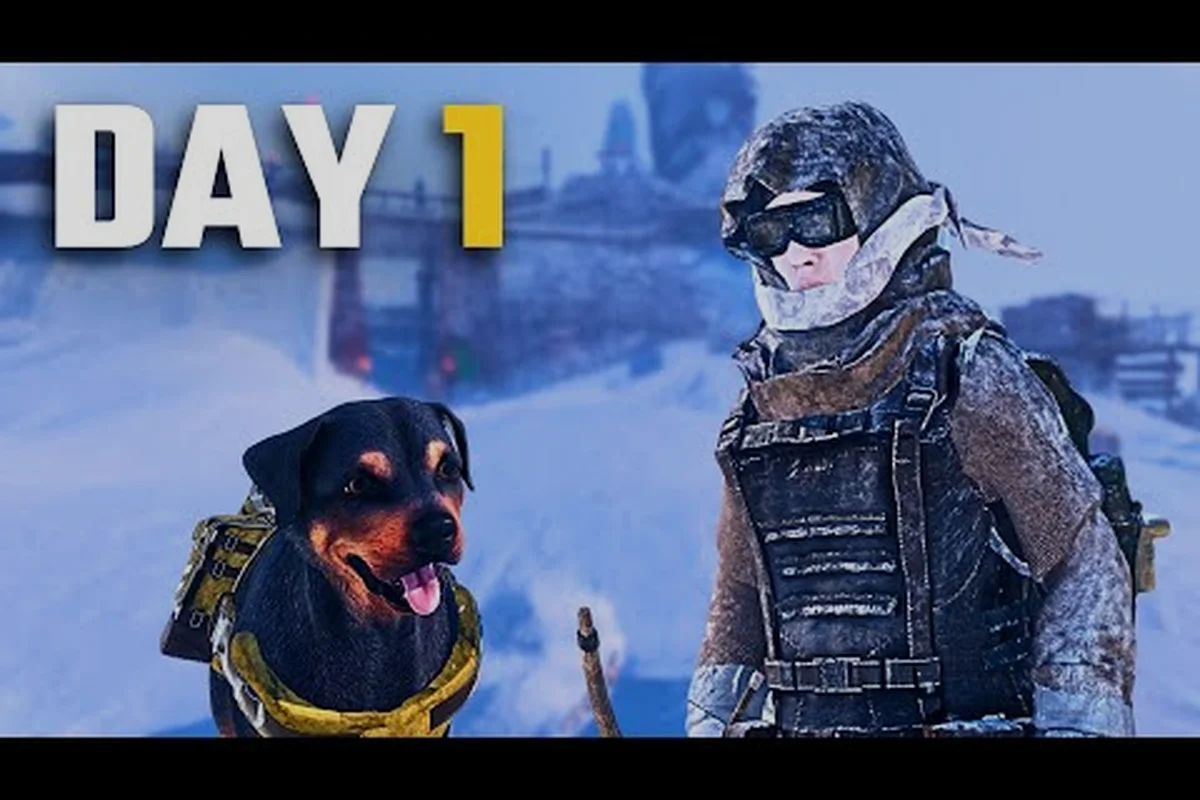
Understanding how the dog companion functions in Permafrost changes the entire survival loop, because a well-managed canine turns a punishing solo trek into a coordinated two-creature expedition. The dog is not a cosmetic follower or a simple combat pet; it is a working partner that carries supplies, retrieves loose resources, and warns you about threats before they become lethal. This guide breaks down every command, behavior, and practical trick so you can stop guessing and start using the dog as the reliable wilderness asset it was designed to be.
What the Dog Actually Does in Permafrost
The dog in Permafrost operates on a command-and-behavior system rather than a full pet-management menu, which means most of its utility comes from positioning, context, and a small set of direct orders. According to the official Steam store page, the companion is described as a rescued animal that moves ahead of you to scope out the path, alerts you to dangers, hauls supplies, and keeps the player steady during long silent stretches. That description is accurate, but it undersells how much micro-management the dog rewards in practice.
The core loop works like this: you issue a call command to bring the dog to your position, a stay command to anchor it in place, and then the dog automatically performs contextual actions based on what is nearby. When you are moving through open terrain, the dog tends to range slightly ahead and bark or posture when it detects a threat, which gives you a few extra seconds to draw a weapon or change direction. When you stop near a container, a carcass, or a loose item, the dog may sniff around and retrieve something if its carrying capacity allows.
One important distinction that new players often miss is that the dog does not have an inventory screen like a traditional RPG companion. Instead, the dog has a pack capacity that fills automatically when you transfer items to it or when it picks up loose resources during gathering behavior. You cannot open a grid and drag items around; you interact with the dog directly and use context prompts to load or unload. This design keeps the companion feeling alive rather than like a walking chest, but it also means you need to learn the interaction range and prompt timing.
| Dog Behavior | Trigger Condition | Player Action Required | Result |
|---|---|---|---|
| Follow | Default state while moving | None | Dog trails behind or beside you |
| Scout Ahead | Open terrain with no recent threat | None | Dog ranges forward, barks at danger |
| Carry | Player transfers items via prompt | Interact and confirm | Items stored in dog pack |
| Gather | Loose resources or small carcasses nearby | Issue gather command | Dog retrieves items to pack |
| Guard | Stay command issued near camp or player | Issue stay command | Dog holds position, warns of approach |
| Warn | Threat detected in scout or guard mode | None | Bark, posture, directional cue |
The dog's usefulness scales with how well you read its body language, because the game does not always flash a text prompt when the animal notices something. A low growl, a sudden stop, or a fixed stare in one direction are all signals that something is wrong, and experienced players learn to treat those cues as seriously as a HUD warning. This is why the companion works best when you keep it in view rather than sending it far ahead and ignoring it.
Call, Stay, and the Command System
The command system is deliberately simple, but the simplicity hides a few non-obvious rules that determine whether the dog obeys instantly or hesitates. The two primary commands are call and stay, and both are available from the radial menu or a dedicated keybind depending on your control scheme. Call brings the dog to your current position, while stay anchors it to a specific spot until you release the command or move far enough away that the follow behavior re-engages.
The stay command is the foundation of most advanced dog tactics, because it lets you turn the companion into a temporary sentry, a pack mule parked at a safe distance, or a distraction while you reposition. When you issue stay, the dog sits or stands in place and enters a heightened awareness state, which means it is more likely to bark at incoming threats than when it is casually following. This makes stay the default choice when you are harvesting a carcass, looting a building, or cooking at a campfire and want an early warning system.
Call has a hidden utility that goes beyond simple recall. If the dog is carrying too much and moving slowly, calling it to you can reset its pathing and sometimes clear a stuck animation. If the dog has wandered into a dangerous area, a quick call can pull it back before it takes damage. The command also works as a soft reset for the dog's AI when it gets confused by terrain, which happens more often in dense forests and rocky slopes than on open ice.
| Command | Best Use Case | Cooldown or Cost | Notes |
|---|---|---|---|
| Call | Recall from danger, reset pathing, regroup before travel | None | Dog returns to player position |
| Stay | Sentry duty, pack parking, distraction setup | None | Dog holds until released or distance triggers follow |
| Gather | Collect loose items, small game retrieval | Short internal cooldown | Dog must be near target |
| Release | Cancel stay, resume follow | None | Useful after camp breakdown |
One community-reported quirk is that the dog sometimes ignores a call if it is actively engaged in a gather animation or if a threat is within its detection radius. In those cases, the dog prioritizes the immediate context over your command, which can feel like a bug but is actually the intended behavior. Waiting for the animation to finish or moving closer usually resolves the issue, and the dog will obey the next command normally.
How Dog Carrying Works
Dog carrying is the mechanic that most directly changes how you plan expeditions, because it effectively expands your inventory without forcing you to build a sled or craft additional storage. The dog's pack capacity is smaller than a full player inventory, but it is large enough to hold a meaningful amount of food, fuel, medical supplies, or crafting materials. This means you can push further from your base, loot more aggressively, and still have room for emergency items.
To load the dog, you approach it and use the interaction prompt, which opens a transfer interface that shows what the dog is currently carrying. You can move items in either direction, and the dog's weight affects its movement speed just like your own encumbrance does. A heavily loaded dog moves slower, tires faster, and may refuse to sprint, so you need to balance what you pack against how quickly you need to travel. Community testing suggests that keeping the dog below roughly two-thirds of its maximum capacity preserves most of its mobility.
| Pack Load Level | Movement Effect | Recommended Use |
|---|---|---|
| Light (under 33%) | Full speed, normal stamina | Scouting, hunting, fast travel |
| Medium (33-66%) | Slight speed reduction | Standard expedition loadout |
| Heavy (66-100%) | Noticeable slowdown, no sprint | Short hauls, base relocation |
| Overloaded | Dog refuses new items | Emergency only, drop weight fast |
The dog's carrying behavior also interacts with the gather command, because any item the dog retrieves goes directly into its pack. If the pack is full, the dog will not gather, and you will see it hesitate or return empty-mouthed. This is a common source of confusion for players who expect the dog to drop items at their feet when the pack is full, but the game instead simply prevents the gather action from completing. Keeping a little spare capacity in the dog's pack is a good habit if you plan to use gathering frequently.
Gathering Behavior and What the Dog Can Retrieve
Gathering is the dog's most underrated ability, because it automates the tedious process of picking up loose resources that would otherwise require dozens of small interactions. When you issue the gather command near a valid target, the dog trots over, picks up the item, and returns it to its pack. The command works on small items like sticks, stones, herbs, and certain food sources, but it does not work on large carcasses, heavy containers, or items that require a tool to harvest.
The range of the gather command is limited, so you cannot send the dog across a valley to fetch something you spotted in the distance. The dog needs to be relatively close to the target, and the target needs to be flagged as a gather-able object by the game's item system. This means the dog is best used as a close-range collection assistant while you handle the heavier harvesting tasks yourself, rather than as a long-distance retrieval drone.
| Item Type | Dog Can Gather? | Notes |
|---|---|---|
| Sticks and branches | Yes | Common fuel source, high priority |
| Small stones | Yes | Crafting material, frequent spawn |
| Herbs and plants | Yes | Medical and cooking ingredients |
| Small game carcasses | Sometimes | Only if flagged as retrievable |
| Large animal carcasses | No | Requires player harvesting |
| Container contents | No | Player must loot directly |
| Tool-required resources | No | Dog cannot use tools |
The gather command has a short internal cooldown, which prevents you from spamming it to instantly clear an area. After the dog completes a retrieval, it pauses briefly before accepting another gather order, and this pause is long enough that you still need to do some manual collection during a busy looting session. The cooldown is not documented in the game's UI, but community testing has confirmed that it exists and that it scales slightly with the distance the dog has to travel.
Guard Behavior and Early Warning
Guard behavior is tied directly to the stay command, which means you do not have a separate guard button to press. When you tell the dog to stay, it automatically enters a watchful state that functions as a guard mode, and this is where the companion's early-warning value becomes most apparent. A guarding dog will bark, growl, or stare in the direction of an approaching threat, giving you time to prepare before the danger is close enough to attack.
The guard behavior is most effective at camp, where you are often distracted by cooking, crafting, or inventory management. Parking the dog near the edge of your camp with a stay command creates a perimeter sentry that watches the most likely approach routes. If a predator or hostile survivor gets close, the dog alerts you, and you can decide whether to fight, flee, or reposition. This is especially valuable at night, when visibility is low and audio cues are your primary warning system.
| Guard Position | Coverage | Best For |
|---|---|---|
| Camp perimeter | Wide arc, early warning | Cooking, crafting, sleeping |
| Building entrance | Narrow choke point | Looting, indoor tasks |
| Player flank | Rear and side coverage | Harvesting, skinning |
| Elevated spot | Long sight lines | Open terrain, travel stops |
One limitation of guard behavior is that the dog does not attack threats on its own. The companion is a warning system and a pack carrier, not a combat unit, so you should not expect it to fight off a wolf or a hostile survivor while you hide. The dog will bark and may posture aggressively, but it will not engage in sustained combat, and leaving it in a dangerous situation for too long can put the animal at risk. The dog scout guide covers threat detection and dog safety in more detail, including how to read the warning cues before a situation turns lethal.
Practical Dog Tips for Every Expedition
The difference between a player who merely owns a dog and one who uses it effectively comes down to a handful of practical habits that are easy to adopt once you know them. These tips are drawn from community reports and observed behavior patterns, and they apply to both solo runs and co-op sessions where the dog's role becomes even more important as a shared resource.
First, always check the dog's pack before leaving your base, because a forgotten load of heavy materials can slow you down at the worst possible moment. Second, use the stay command liberally when you stop to harvest or loot, because the early warning it provides is worth the small delay of issuing the command. Third, keep the dog's pack at medium load or lighter unless you are deliberately hauling a large quantity of resources back to base, because mobility is often more valuable than extra carrying capacity in a survival emergency.
-
Pre-trip pack check: Unload unnecessary items before every expedition to keep the dog mobile.
-
Stay at every stop: Anchor the dog whenever you pause for more than a few seconds.
-
Gather in bursts: Use the gather command in short sequences rather than spamming it.
-
Watch body language: Treat growls, stares, and sudden stops as actionable warnings.
-
Balance the load: Keep the dog under two-thirds capacity for normal travel.
-
Call early, call often: Use call to reset pathing and pull the dog out of danger.
The dog also functions as a morale anchor in the game's psychological survival systems, though the exact mechanics of this are not fully documented. The official description mentions that the companion steadies you when the isolation drags on too long, and players have reported that having the dog nearby reduces the negative effects of solitude during long solo stretches. This is a subtle benefit that does not show up in any stat screen, but it makes the dog valuable even when you are not actively using its carrying or gathering abilities.
Advanced Dog Management for Long Runs
Once you have mastered the basic commands, the dog becomes a tool for optimizing your entire survival strategy rather than just a convenience. Long runs, base relocations, and multi-day expeditions all benefit from a more deliberate approach to dog management, and the players who get the most out of the companion are the ones who plan around its strengths and limitations.
Base relocation is the most obvious use case for advanced dog management, because the dog's pack capacity lets you move a significant amount of material in a single trip. Instead of making multiple runs or leaving valuable resources behind, you can load the dog with the essentials and keep your own inventory free for weapons, tools, and emergency supplies. The beginner guide covers the fundamentals of base setup and early survival priorities, which pairs well with the dog's role as a mobile storage extension.
| Expedition Type | Dog Load Priority | Command Strategy |
|---|---|---|
| Short scavenging run | Light load, empty pack space | Stay at loot sites, gather nearby items |
| Hunting trip | Medium load, food and medical | Scout ahead, stay during harvest |
| Base relocation | Heavy load, essential materials | Follow closely, avoid combat |
| Night travel | Light load, emergency supplies | Stay at rest stops, guard perimeter |
| Co-op session | Shared supplies, ammo, fuel | Coordinate stays, split gathering |
The dog's behavior also changes subtly depending on whether you are playing solo or in co-op. In co-op, the dog tends to follow the player who issued the most recent command, which means your group needs to communicate about who is directing the companion at any given time. This prevents the dog from getting confused by conflicting orders and ensures that its carrying and guarding abilities are used where they are most needed. The dog companion guide goes deeper into how the dog fits into different playstyles and group dynamics.
Frequently Asked Questions
How does the dog work in Permafrost?
The dog works through a command system built around call, stay, and gather orders, plus automatic contextual behaviors like scouting and warning. You load items into its pack through a direct interaction prompt, and the dog retrieves loose resources when you issue the gather command near valid targets.
Can the dog carry items for me?
Yes, the dog has a pack capacity that you can fill through the interaction prompt. The dog's movement speed decreases as its load increases, so keeping it under two-thirds capacity preserves most of its mobility during normal travel and hunting expeditions.
Does the dog fight enemies?
No, the dog does not engage in sustained combat. It warns you of threats by barking, growling, or staring in a specific direction, but you need to handle the actual fighting yourself. Leaving the dog in a dangerous situation for too long puts it at risk.
How do I make the dog guard my camp?
Issue the stay command near the edge of your camp, and the dog automatically enters a watchful guard state. It will alert you to approaching threats while you cook, craft, or sleep, giving you time to prepare before the danger arrives.
Why won't my dog gather items?
The most common reason is a full pack, because the dog cannot retrieve new items when its carrying capacity is maxed out. The gather command also has a limited range and a short internal cooldown, so the dog needs to be close to the target and finished with its previous retrieval.